Halloooo! Daryll here. Daryll B. Aday. I am back to tell you more about my transformation. The potty/closet is a very important part of a trailer to some people. Mine was a wreck...
This whole street side area needed lots of TLC! All the cupboard doors were removed as was the hardware. The fridge was taken out.the cabinet facing was removed. The old trim was removed from the closet. The window frame was removed and polished.
Using my old cabinet wall as a pattern a new one was made. The doors were painted and reattached.
99 primed and painted my fridge door. First she did it in metallic silver but didn't like it. So she used rustoleum rattle can blue and that turned out much better.
 |
| This is the fridge door frame covered in paint and paint remover! |
 |
| Frame is primed! |
 |
| Door is primed! |
 |
Don't worry...this will all be cleaned up too!
|
Here is my fridge in the metallic. 99 did not like this at all, so back to the drawing board we went for a do over!

We went with a blue to match the doors leaving the grate-like center metallic. The door still needs some fixing where it hinges in place and 99 is still working on a proper plan for this.
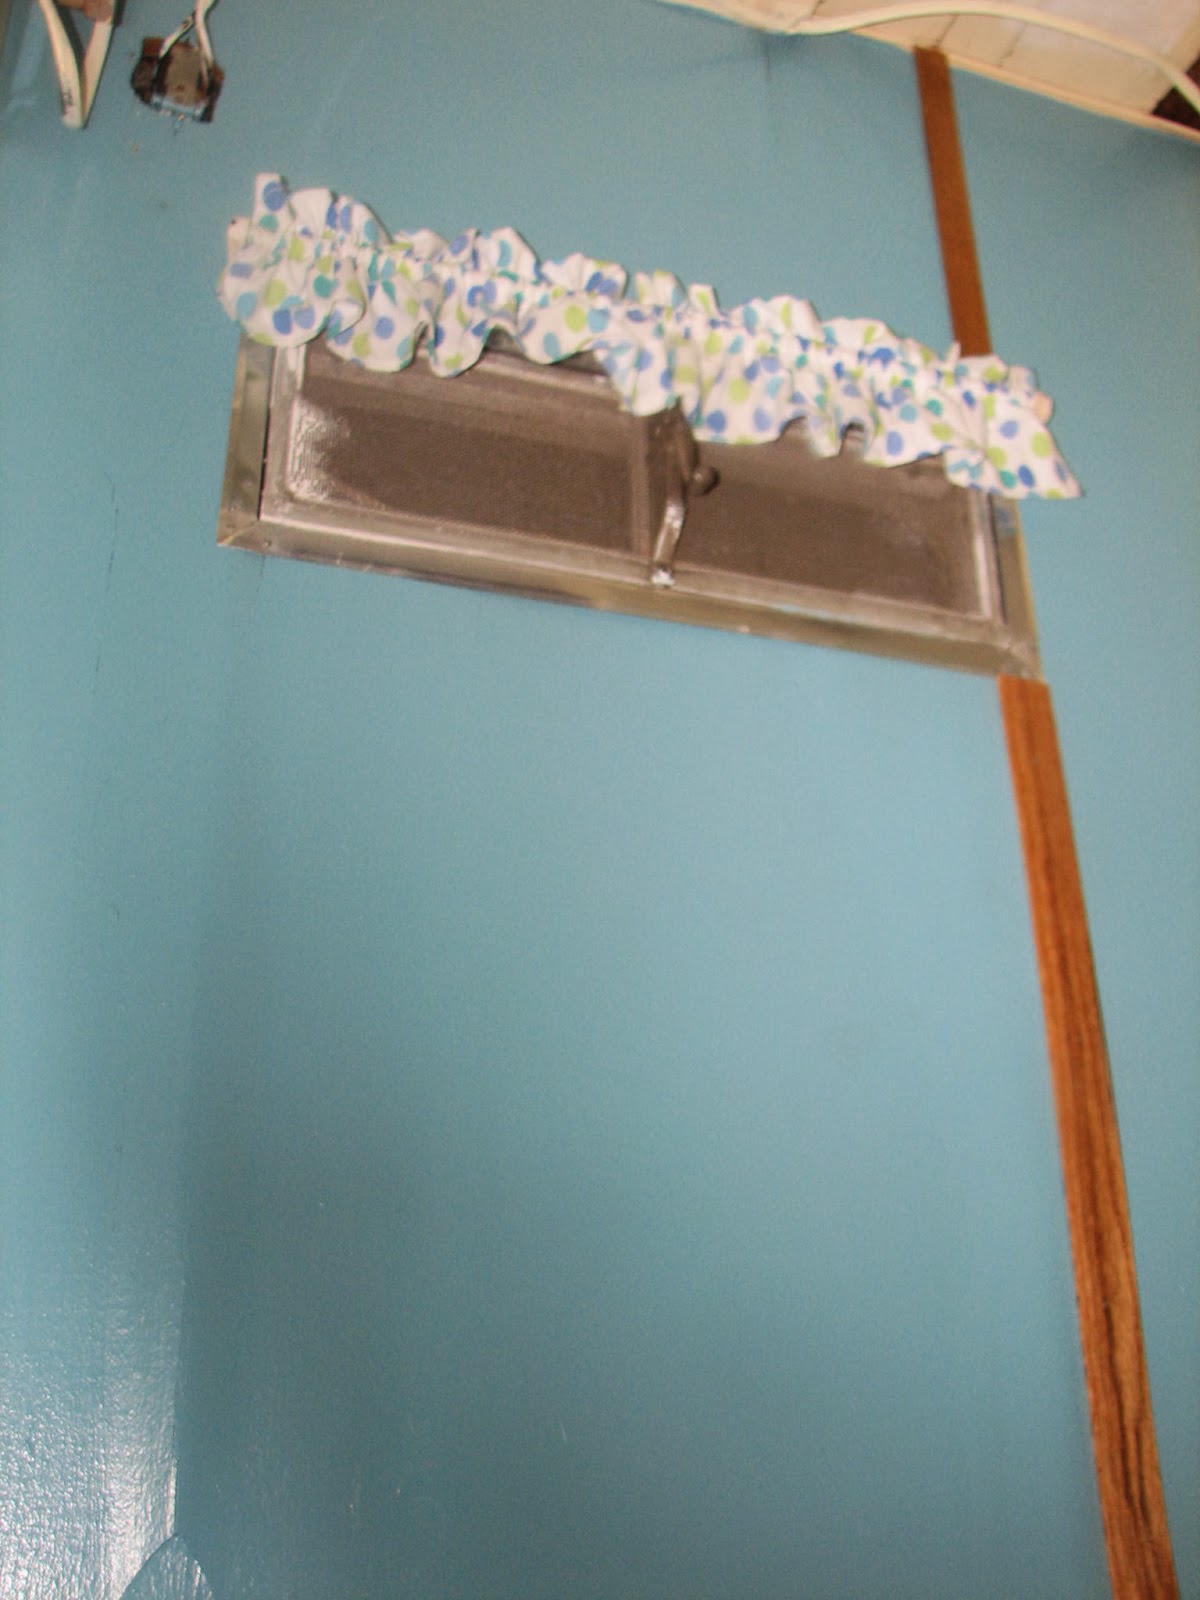
The decorative piece at the top was also made using the old one for a pattern. A curtain was hung for the closet and the doorway was lined with oak trim. 99 had hoped to have time to make a door. Hey, if you are using it for a closet, we think the curtain is good for now. Besides, should you really be camping in such a tiny space with someone who would make you nervous if you had to go potty behind a curtain? We think not! I mean compared to one of those monster RV hotels on wheels, I am so small you couldn't yell at a cat in here without getting a mouthful of hair!
There is not a potty in there now and no signs that there ever was one. A porta potty should fit nicely though!

Much better than before!
The curved end of the outer closet wall had some damage and a prior repair. This was caused by a previous leak from days gone by. 99 did not feel the need to replace the whole wall, so she decided to create a scalloped edging to go over the prior repair and fix the area where there was a hole. She force warped a piece of oak cut into shape and attached it around the curve. It is not a super tight fit all around the way she would have liked, but that wall is not as "flat" in the curve as it once was. It looks much better and is very secure in place now.
Below you can see how this area was previously repaired. The ceiling panels did not even meet the curved wall.

One ceiling panel was removed and replaced. The brace boards were in good condition and did not require replacement.
A small piece was cut to fit where the gap was. Turns out 99 dd the same thing the other person did and cut the end of the ceiling panel straight! Big dummy! Eh, she's tired. I will give her a pass this time.
Below is the piece that was force warped. It was run under hot water and slowly bent to take shape.
Next it was attached. Since these trailers are so old it often seems nothing is square like it once was. So the space where it should meet will be filled in and it will all be painted.
Inside there is a hole in the ceiling from that previous leak. It does not leak now and the brace boards look to have been replaced at some point. This should actually be covered in some manner, eventually. To 99, this sight was about as welcome as a skunk at a lawn party.
A cute little mirror was hung using the old style hangers. The electric boxes need to be boxed in and out of sight. 99 is holding off on this for now. A medicine cabinet could be built and placed in this area that would also serve to cover the electric boxes.
Oak trim was put up at the seam of the wall.
Floor was all trimmed in with oak and carpet was put down.

The visible wheel well was also trimmed in to make it more aesthetic.
The old floor! Yucky!
So we went from this...
To this....
To this...
And this....
To this...
There are tons of final odds and ends that need to be done. There are tons of other areas that have been improved too! I am tired from watching 99 work though, so I can't get into all of that now. I mean I could tell ya a thing or two more about a thing or two. Gonna save it. Just know that I am happier than a possum in a corn crib with the dog tied up! On top of that 99 is going through me like Sherman went through Georgia, so it won't be long until I am looking prettier than a glob of butter melting on a stack of flapjacks. It's not bragging if you can back it up, and I think I am gonna be able to do that right soon. There'll be a day. You'll see....
For now, I leave you with this. Always remember that the tallest tree in the forest was once just a little nut that held it's ground! If you believe in something, always hold your ground and hang in there. Never give up. Ya' hear?!!
Sincerely,
Daryll B. Aday


.jpg)
.jpg)
.jpg)
.jpg)
.jpg)
.jpg)
.jpg)
.jpg)
.jpg)
.jpg)
.jpg)
.jpg)
.jpg)
.jpg)
.jpg)
.jpg)
.jpg)
.jpg)
.jpg)
.jpg)
.jpg)
.jpg)
.jpg)


.jpg)


.jpg)
